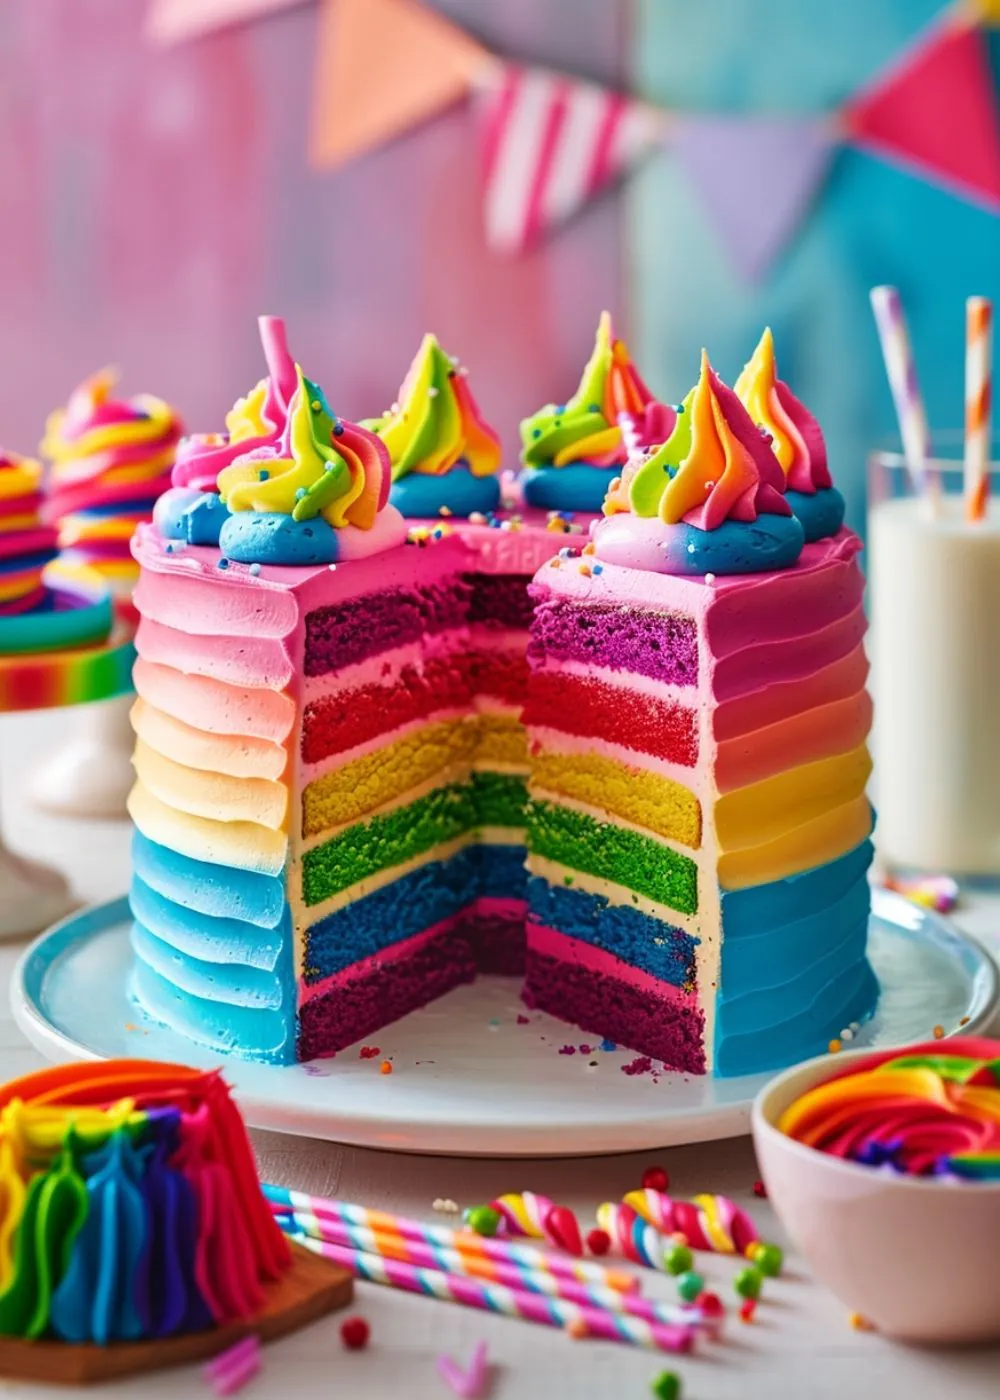
There’s something undeniably magical about a rainbow cake! Not only is it visually stunning with its layers of vibrant colors, but it’s also moist, fluffy, and a perfect centerpiece for any celebration. Whether it’s a birthday party, a pride celebration, or just a fun baking day, this Rainbow Velvet Cake is sure to impress both kids and adults alike.
Let’s get started with everything you need to make this showstopper dessert!
Ingredients You’ll Need
Here’s what you’ll need to bake your colorful creation, along with some handy tips to make your baking process seamless:
- 2 ¾ cups (350g) all-purpose flour: The foundation of our cake. Be sure to sift it for a soft, fluffy texture.
- 1 ¾ cups (350g) granulated sugar: Sweetens the batter and gives that perfect tender crumb.
- 1 tablespoon baking powder: Ensures your layers rise evenly and beautifully.
- ½ teaspoon baking soda: Balances the acidity and provides an extra lift.
- ½ teaspoon salt: A pinch enhances the flavors.
- ¾ cup (180ml) vegetable oil: Keeps the cake moist and gives it a velvety texture.
- 1 ½ cups (360ml) buttermilk: Adds a tangy richness and creates the perfect crumb.
- 4 large eggs: Bind everything together and provide structure.
- 1 tablespoon vanilla extract: The classic flavor base for your cake.
- 6 different gel food colorings (red, orange, yellow, green, blue, purple): Vibrant hues that won’t affect the texture of your batter.
- 3 cups (750g) cream cheese frosting: Rich, creamy, and perfect for layering and decorating.
Prep Tip: Use gel food coloring instead of liquid—it gives brighter colors without thinning your batter.
How to Make Rainbow Velvet Cake
This step-by-step guide will walk you through the entire process from mixing the batter to the final decorations.
Step 1: Preheat and Prepare
Preheat your oven to 350°F (175°C). Grease and line six 8-inch round cake pans with parchment paper. If you don’t have six pans, bake in batches.
Step 2: Mix the Dry Ingredients
In a large bowl, whisk together the flour, sugar, baking powder, baking soda, and salt until evenly combined.
Step 3: Combine the Wet Ingredients
In another bowl, whisk the vegetable oil, buttermilk, eggs, and vanilla extract until smooth. Gradually add this mixture to the dry ingredients and mix until just combined—avoid overmixing to keep the batter light.
Step 4: Divide and Color
Divide the batter evenly into six bowls (about 1 cup per bowl). Add a small amount of gel food coloring to each bowl to create vibrant red, orange, yellow, green, blue, and purple batters. Mix well until the colors are fully incorporated.
Step 5: Bake the Layers
Pour each colored batter into a prepared cake pan. Bake for 15-20 minutes or until a toothpick inserted in the center comes out clean. Allow the layers to cool completely before removing them from the pans.
Step 6: Assemble the Cake
Place the purple layer on a cake board or plate. Spread a thin, even layer of cream cheese frosting on top, then stack the blue layer. Repeat with the green, yellow, orange, and red layers, frosting between each one.
Step 7: Frost and Decorate
Spread a crumb coat of frosting around the entire cake to lock in crumbs, then chill for 15 minutes. Apply a final layer of frosting, smoothing it out evenly. Decorate with swirls of frosting on top and sprinkle with rainbow sprinkles for extra flair.
Equipment Needed for This Recipe
- 6 round 8-inch cake pans
- Mixing bowls
- Electric mixer or whisk
- Spatula
- Piping bag and star tip (optional for decorating)
- Cake stand or board
- Offset spatula for frosting
Frequently Asked Questions
Can I make this cake ahead of time?
Yes! You can bake the layers a day in advance. Wrap them tightly in plastic wrap and store them at room temperature. Frost the cake on the day you plan to serve it for the freshest result.
What if I don’t have buttermilk?
No problem! You can make a substitute by mixing 1 ½ tablespoons of lemon juice or white vinegar into 1 ½ cups of milk. Let it sit for 5 minutes before using.
Can I use regular food coloring?
Liquid food coloring is less vibrant and can thin out your batter. Gel food coloring is highly recommended for the boldest colors.
How do I keep my layers even?
Use a kitchen scale to divide the batter equally among the bowls. This ensures each layer is the same size and thickness.
Can I freeze leftover cake?
Absolutely! Slice the cake and wrap each piece tightly in plastic wrap, then store in an airtight container in the freezer for up to 3 months. Thaw at room temperature before serving.
What’s the best way to smooth the frosting?
Use an offset spatula or a bench scraper for an even, professional finish. Chilling the crumb coat first makes it easier to apply the final layer.
Can I make this gluten-free?
Yes, simply substitute the all-purpose flour with a gluten-free 1:1 baking flour. Make sure all other ingredients (like baking powder) are gluten-free as well.
Let’s Bake a Rainbow!
I hope you loved this colorful journey of creating a Rainbow Velvet Cake! It’s a labor of love, but the result is absolutely worth it—a sweet, vibrant masterpiece that’s guaranteed to bring smiles. Don’t forget to share your gorgeous cake on Facebook using the share buttons below or save this recipe on Pinterest for your next special occasion. Happy baking! 🌈