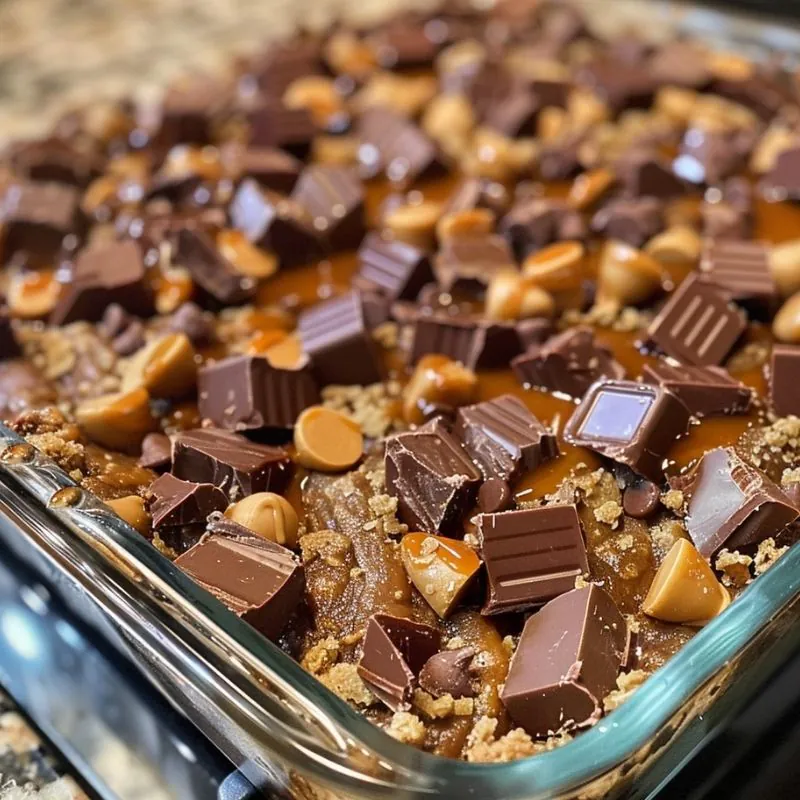
When chocolate meets peanut butter, magic happens—and this Chocolate Peanut Butter Cake is no exception! Imagine layers of gooey chocolate, creamy peanut butter, and a medley of crunchy and soft textures that create a dessert that’s both indulgent and irresistible. Whether you’re hosting a gathering or simply treating yourself, this no-bake cake will have everyone coming back for more.
Ingredients You’ll Need
Here’s everything you need to whip up this delightful dessert. Each ingredient plays a crucial role, so let’s break it down:
- 2 cups crushed graham crackers: These make up the buttery, crumbly base that holds everything together. For an easy prep, pulse graham crackers in a food processor.
- 1 cup melted butter: Essential for binding the crust while adding richness. Pro tip: use unsalted butter to control the saltiness.
- 1 cup creamy peanut butter: This provides that signature nutty flavor and a luscious creaminess. Microwave it for 20 seconds to make it easier to spread.
- 1 cup powdered sugar: Sweetens the peanut butter filling without making it gritty.
- 1 can (14 oz) sweetened condensed milk: Gives the caramel layer its gooey, luxurious texture.
- 2 cups milk chocolate chips: Melted chocolate gives the top layer that glossy, decadent finish. Use high-quality chips for the best flavor.
- 1 cup peanut butter chips: Adds a pop of color and an extra burst of peanut butter flavor.
- 1 cup mini peanut butter cups, chopped: These add fun, chunky pieces throughout the dessert for texture.
- 1/2 cup crushed cookies or toffee bits: Sprinkle these on top for added crunch!

How to Make Chocolate Peanut Butter Cake
Let’s dive into the step-by-step process to create this delicious masterpiece:
Step 1: Prepare the Crust
In a large bowl, mix the crushed graham crackers and melted butter until the crumbs are evenly coated. Press the mixture into the bottom of a 9×13-inch pan, making sure it’s firmly packed to form a solid base. Place it in the fridge to set while you prepare the next layer.
Step 2: Make the Peanut Butter Filling
Combine the creamy peanut butter and powdered sugar in a bowl until smooth. Spread this mixture evenly over the chilled crust. Chill again to let the layers firm up.
Step 3: Add the Caramel Layer
Pour the sweetened condensed milk into a saucepan and heat on low until it thickens slightly. Pour it over the peanut butter layer, spreading it evenly. Let this layer set in the fridge for 10–15 minutes.
Step 4: Melt the Chocolate
Melt the milk chocolate chips in the microwave in 30-second intervals, stirring in between to avoid burning. Pour the melted chocolate over the caramel layer, smoothing it out with a spatula.
Step 5: Top It Off
While the chocolate is still soft, sprinkle the peanut butter chips, chopped peanut butter cups, and crushed cookies/toffee bits evenly over the top. Press lightly to make sure everything sticks.
Step 6: Chill and Serve
Refrigerate the entire pan for at least 2 hours or until fully set. Slice into squares and serve chilled or at room temperature.
Equipment Needed
- 9×13-inch baking pan: The perfect size to hold all the layers.
- Mixing bowls: For combining your crust and fillings.
- Spatula: For spreading each layer evenly.
- Microwave-safe bowl: For melting chocolate effortlessly.
- Refrigerator: Essential for setting the layers.
Frequently Asked Questions
Can I use crunchy peanut butter instead of creamy?
Yes! Crunchy peanut butter adds a fun texture to the filling. Just make sure to spread it evenly to avoid gaps.
How do I store this cake?
Store it in an airtight container in the fridge for up to a week. You can also freeze it for up to 3 months—just let it thaw before serving.
Can I make this dessert gluten-free?
Absolutely! Simply use gluten-free graham crackers or cookie crumbs for the crust.
What’s the best way to melt chocolate?
Microwave the chocolate chips in 30-second bursts, stirring after each, or use a double boiler for a more controlled melt.
Can I swap milk chocolate chips for dark chocolate?
Yes, dark chocolate works wonderfully if you prefer a less sweet dessert with a richer flavor.
Do I have to use peanut butter cups?
Not at all! You can substitute with chopped chocolate bars, nuts, or even pretzels for a salty-sweet twist.
Is this recipe kid-friendly?
Definitely! It’s simple to make, and kids will love helping with the toppings and sneaking bites of peanut butter cups!
Conclusion
This Chocolate Peanut Butter Cake is everything you want in a dessert—easy to make, packed with flavor, and sure to impress. I hope you loved this recipe as much as I enjoyed sharing it with you! Don’t forget to hit those share buttons below to spread the joy on Facebook or save this recipe to Pinterest for your next baking adventure.


